
Eclipse Kepler, even in the Java EE Developers edition, does not include a good enough support for automatic tests development. Both NetBeans and IntelliJ have superior native support for testing. For example, if you rename one class, Eclipse does not rename its test class.
To overcome such limitations, we need to install a plugin.
In this tutorial, I will describe moreUnit (http://moreunit.sourceforge.net/), a plugin which extends Eclipse testing support. I will not cover moreUnit installation because it is quite standard.
Let’s create a standard ant based Eclipse project. In the example the project name is “EclipseTest” and the main package is “it.gualtierotesta”.

In the package, I’ve created a new Java class named MyClass with the following content:
package it.gualtierotesta;

public class MyClass {

    private String msg;

    public String message() {
        return generateMsg();
     }

    private String generateMsg() {
        return "Hello " + msg;
    }

    public String getMsg() {
        return msg;
     }

    public void setMsg(String msg) {
       this.msg = msg;
    }

}
Very simple. We want now to create a unit test to check the message() method. While in the Java Editor window, you should press Ctrl+R (or, from the contextual menu, MoreUnit –> Jump To Test) to trigger test class creation.

where we can select our preferred unit library. In this tutorial we will use JUnit 4.
Press “Finish” to confirm. Note: Eclipse will eventually ask you to add JUnit library to the project build path.
In the created test class (MyClassTest.java file), add the following contents:
package it.gualtierotesta;

import org.junit.Assert;
import org.junit.Test;

public class MyClassTest {

@Test
 public void showMessage() {
     // given
     MyClass sut = new MyClass();
     sut.setMsg("Gualtiero");
     // when
     String res = sut.message();
     // then
    Assert.assertEquals("", res);
 }

}
Note: sut is system under test.
In the test class window, press Ctrl+R to run the test. Test will fail:
 This is expected because the Assert.assertEquals check for the wrong result.
Change the Assert line as following:
Assert.assertEquals("Hello Gualtiero", res);
E re-run the test (Ctrl+R). Test will now succeed.

Note: in the test method body I added some comment lines to divide the body instructions in three sections. Given section is where the test texture is prepared, when is the execution of the method under test and the then section marks the results checks instructions (assertions). This is a good habit to make test strategy clearer. It comes from BDD, Behavior Driven Development (http://en.wikipedia.org/wiki/Behavior-driven_development).
A nice moreUnit feature is to mark the Java source file icon with a small green rectangle to show that the class has a test class.
 We have now our test running without failure but still our setup is not correct: test classes should be placed in a different source folder because they should not be packaged and released to the user.
Traditional approach is to have src dir for Java source files and test dir for test classes.
We create now a new folder named “test” under project root:

Then in the Java Build Path section of the project properties we add the new test folder as one of the project source folders:

Finally we configure moreUnit to use the “test” folder as the place to create and look for test classes:

Finally we can move the MyClassTest.java to the test folder (or create it again).
At the end, the project configuration is the following:
 As shown in this short tutorial, moreUnit plugin simplify a lot test classes handling in Eclipse.
Moreover, moreUnit offers special support for mocking libraries users. The test class creation wizard has additional pages to insert mocking specific instructions in the test class:
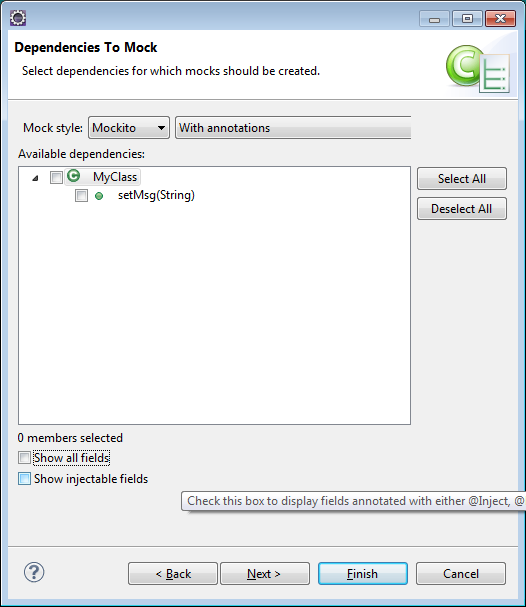
In this page, you can select the dependencies you want to mock and moreUnit will add specific mocking instructions. For more info about Mockito, have look here and here.
